STRIP PLANKING GUIDE
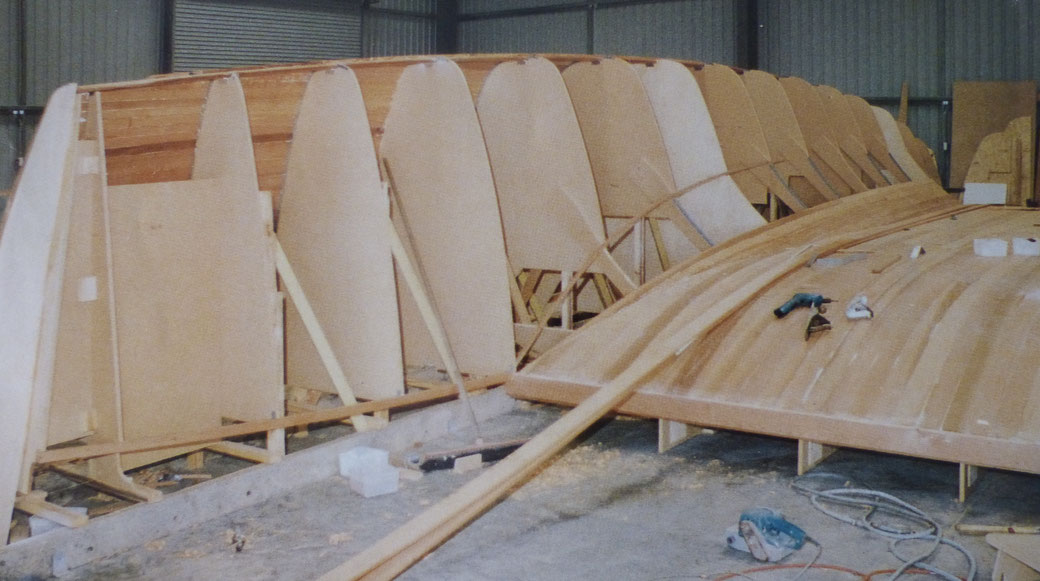
Above: The plug for the Chincogan 40 catamaran, entirely planked in western red cedar, with the plug later becoming the first boat after molds had been made.
IT'S NOT THAT HARD
Strip planking a boat hull is very straight forward process that doesn't take a great deal of skill or technical capability. But there's a few basic principles to follow. The most important one is the orientation of the planks which we've covered under "Planning the Planking".
PLANKING PROFILE
If you follow the techniques of the strip plank canoe and kayak builders (Pinterest is one good source) you'll notice a lot of them machine the strips to a concave/convex profile so they fit really snuggly on the mould frames and a minim of glue is used.
I've seen this done on offshore sailing catamarans as well but unless you're fanatical about detail it's probably overkill for larger boats. There is more cost for the machining and more wastage in the lost timber. Rectangular planks work fine.
PLANKING WIDTHS
The wider the strips the less glue joins you have to make. However wider planks create wider flats and higher ridges on the joins creating more work to fair the hull. A good compromise is wider planks on the keel plank and on the flatter hull sides, and narrower planks on the bilge curve.
For a hull bottom in the 40' to 50' size range I suggest a plank width of about 45mm for about two thirds of the area, and scale down to about 30mm for the bilge curve.
If you're going all the way up to the gunnel with the planks you could increase the planking widths to 70mm, 90mm or more if the topsides are flat enough.
GLUING TECHNIQUE
One method I've seen used is dry planking - whereby all of the planks are simply laid up dry and then the glue is screeded into the gaps when the planking is all done. This method relies on getting the consistency of the glue just right. If it's too thin its going to run through the cracks onto the shop floor below. If it's too thick it's not going to fill all the voids. Keep in mind that the width of the gaps between the plans will vary as the curvature changes so no consistency is going to be absolutely perfect for every part of the hull.
My advice is not to use this technique unless you "know what you're doing".
Another way of speeding up the gluing process is to clamp several planks side by side and run a squeegee or a cartridge gun down the line covering them all at once. Be careful not to apply glue to more planks than you can carefully lay before the epoxy begins to set.
The strip planking work can proceed very quickly with an efficient team of two or three workers. If I remember correctly we were able to plank the hull side of a 40' catamaran in two days with three workers. But don't be tempted to rush the job. Keep the planking neat and tidy. Clean up as you go, especially on the inside as much as you can. A bit of extra clean up work can save a lot of sanding later.
SELECTING MATERIALS FOR THE STRIPS
Western Red Cedar is forgiving and easy to work with. The main downside is that it's more expensive than it used to be in the 1980's and 90's when strip planking was probably the most popular method for building one off sailing boats.
Another relatively light timber that appears to be rot resistant is Pawlownia which is readily available in South East Asia and possibly in some western countries as well.
Strip planking with foam/glass strips has become a very popular method of creating round bilge hulls while retaining the light weight and durability of the PVC foam/fibreglass combination.
Typically full size foam sheets (1.2m x 2.4m) are joined up to the full length of the hull (the foam can be simply but joined with an epoxy glue) and laid up with unidirectional glass in the x axis (along the hull) both sides of the core. . The panels are then ripped into strips of the required width.
A possible compromise between the solid timber and the foam glass strips is to us ATL's Durakore with a PVC foam core and Hoop Pine veneers on each face. This is probably slightly more expensive but the panles dont need a glass laminate prior to planking and the timber faces are easier to fair than glass/epoxy.
PLANNING THE PLANKING
This is pretty basic, but it's important to a tidy job and if you don't get it right you can create a lot of hard work for yourself. Quite simply; Don't cross the bilge curve. Plan your planking operation so that your planks will run parallel with the tightest curve in the hull. Crossing the bilge curve at an angle will force the planks to twist and this can cause a lot of extra fairing work.
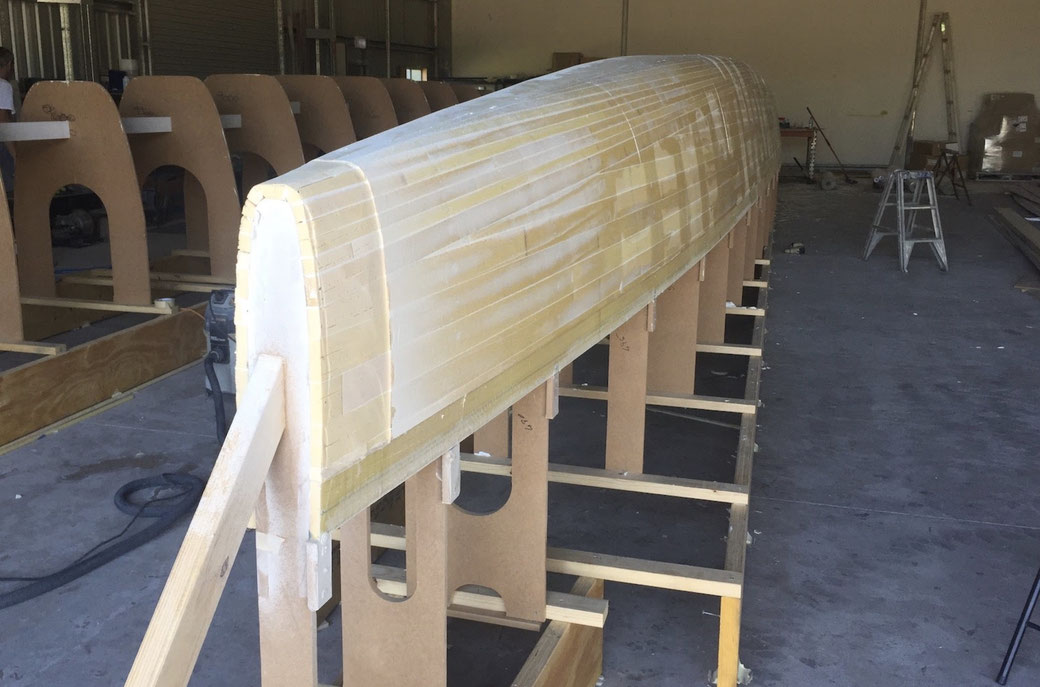
A great shot of the hull shoe planking on Raku 48 Mint. There are different ways you can approach the planking operation and I don't know exactly how it was approached on this hull; but here is one way it could have been done:
1. A marking plank was laid along the bilge curve, not glued in placed but used to mark the lay of the bilge planks.
2. A second marking plank was laid parallel I guess about 300mm further down the hull side. This determined where the lower planks (on the mould) would be trimmed off.
3. A plank is then rebated into the mould frames on this line and covered in plastic to provide a solid backing for the saw when it comes time to trim these planks.
The same can be done on the keel line to assist with trimming the keel planks.
4. The bottom planking is completed and then trimmed off as planned. Note that it would have been reasonably easy to clean up excess glue on the inside face while this was being done. Not quite so easy for the upper planks when doing the second side.
The narrower planking on the bilge and hull bottom can now begin and proceed up to the keel where once again it is trimmed along the keel line.
It is recommend to partially plank each side concurrently to avoid putting a lot of twisting load on the mould frames and strongback.
5. When closing in the final planks on the second side it will be necessary to fit some of the planks by spiling the ends to meet the keel line.
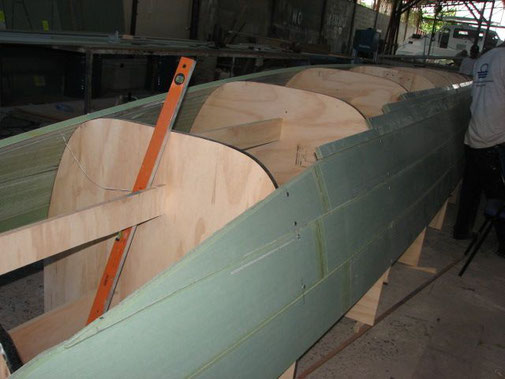
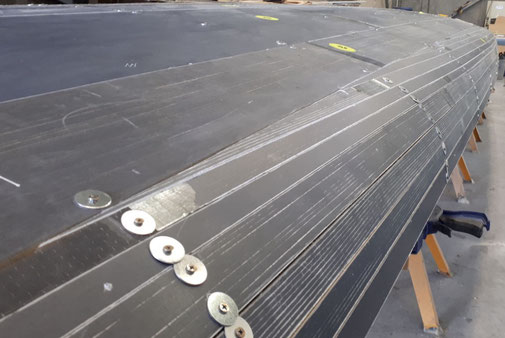
Bottom planks on a Barefoot 40 hull, ready to be trimmed off where they meet the marking plank. No backing plank has been provided for the trimming operation in this example.
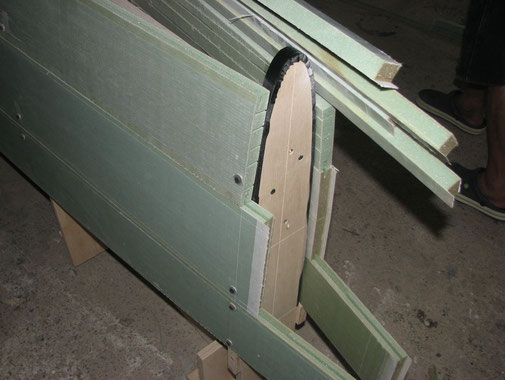
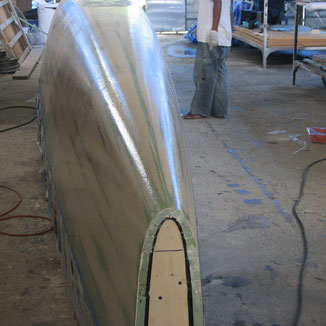
Barefoot 40 detail and the stem. The planking is 20mm thick and the final planks at the keel line have been cut down to about 25mm wide.
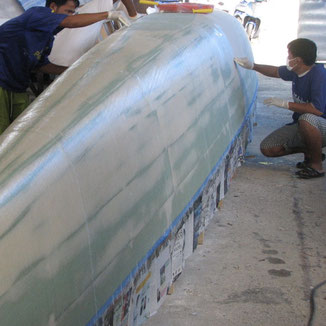
Biaxial Glass at ±45˚ has been laid across the hull over the finished planking. The joins in the glass do not need to be overlapped. The laminators are pulling excess resin from the laminate with squeegees.
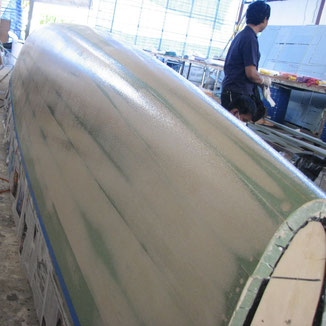
Laminating of the external hull surface completed.
Two extra coats of epoxy have been applied to ensure the hull is well sealed.
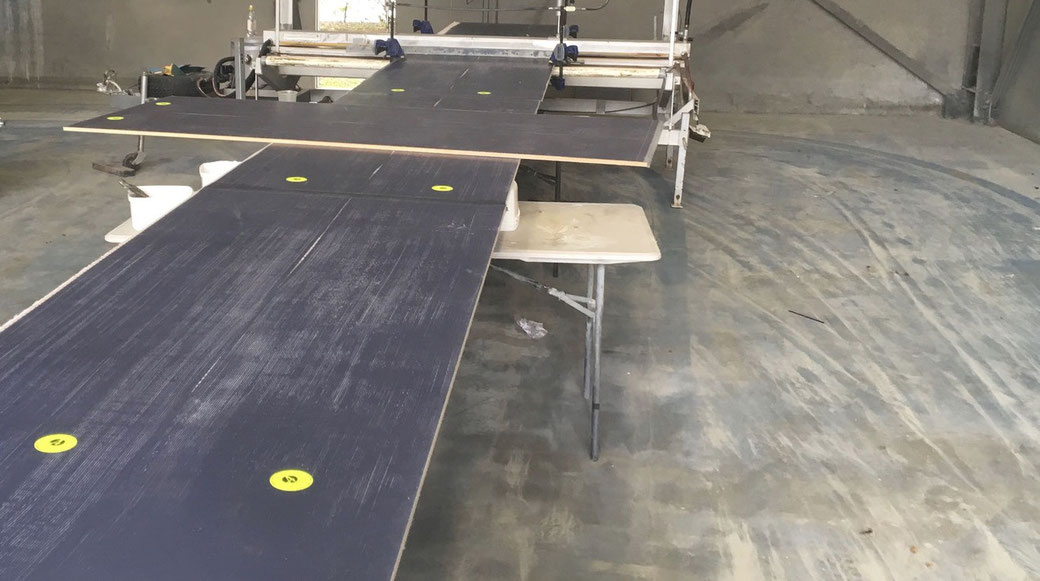
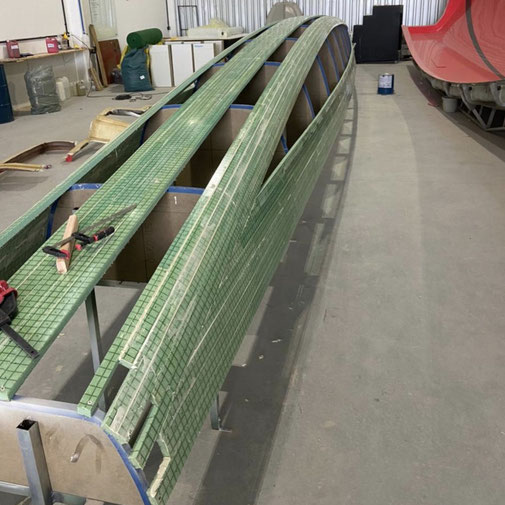
Construction of R42 Trimaran Venom. Panels of PVC foam with unidirectional carbon skins are being joined up to the length of the boat using a heat press supplied by ATL Composites. The heat press greatly speeds up the joining operation but if you don't have access to the heat press you can also join the panels using screws and clamping boards. (see this link)

Strip planking the outriggers for R42 trimaran Venom.

Two shots of the first hull for the Raku 44 trimaran under construction in Brazil. You watch progress of the construction for this boat on this link.

